This is broken into three parts:
- Creating a Style
- Creating a Geometry Theme
- Modifying Geometry Theme
Creating a Style
A Geometry Theme can be created without a style, but the style helps with the display when brought into OBIEE.
The styles help highlight portions of a map. Since this is a new map data source there are no styles.
The built in Help has a very informative section on Styles.
These styles are maintained in the USER_SDO_STYLES view of the Oracle database that was identified in the Map Viewer datasource configuration.
For the Geometry Theme that will be used in OBIEE the only style that is needed is the Line to show the borders of the states. If a State Name or Abbreviation is need to be displayed then Texts style will also be needed. In this scenario a simple Black line will be used to show state borders.
Connect to the MVDATA and then expand the upper structure.
Right Click on Lines and select Create Line Style.
In the New Line Style properties pane provide a name for the Style. The standard naming convention for styles is to prefix the name with the first letter of the style. I will also then indicate the color and thickness of the line. The Description is optional but helpful.
Finally the style needs to be saved so that it is written to the the database and available for use.
Now that a style is defined a Geometry theme can be created.
Creating a Geometry Theme
Click on the Show Data in the lower left of the screen and navigate to the Geometry data that was uploaded in Working with 3rd Party Shapefiles. Right Click on the table and select Create Geometry Theme.
The Create Geometry Wizard will open.
Step 1: Provide a Name for the Theme. Note do not use spaces in the name.
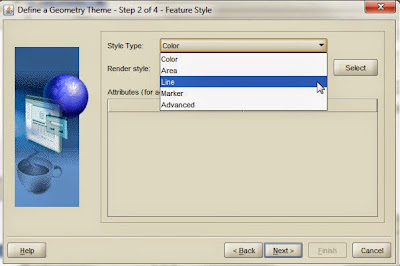
Step 2: Apply a Style that was created earlier

Step 3: If a label is needed then apply the Text Style and the attribute associated with the Geometry that will be displayed. This option can be added to the Theme later if necessary.
Step 4: Apply a query condition to the Geometry table. For example if the Geometry data for the United States included the Territory of Puerto Rico and it needed to be excluded from the Geometry Theme the condition would contain NAME <> 'Puerto Rico'. For this example it will remain blank. This option can be added to the Theme later if necessary.
A final review of the Theme is presented. Click Finish.
Once created the Theme will appear in the list and the Properties panel will be visible.
The Style Rules panel can be updated as per needs.
The Advanced panel is what will be updated so as to provide link to OBIEE data.
To View the map click on the Preview tab at bottom of screen and click the Green Play button on the preview panel.
Use the Pan/Zoom and Identify buttons just as when previewing the Geometry table that was uploaded from the shapefile.
Modifying a Geometry Theme
The Advanced Tab allows for creating linkage between Geometry Theme and OBIEE. The RowID is the current Key Column which denotes a unique row in the theme. This can be updated to any attribute column in the data and I will often set it to the State FIPS code (STATEFP) or the GEOID column.
To add Info Columns that will be used to join to OBIEE data Click the small pencil in the lower left corner of the Advanced panel.
In the Edit Info Columns click the Add button
Select the columns and provide appropriate names. Note do not use spaces in the Name column.
The Advanced panel will now have the 2 new Info Columns.
Save the modifications.
Now we are ready to bring the Geometry Theme into OBIEE and use in a Map View. That is the topic of a different post.


Thank you for such useful information! That helps me to create a style,
ReplyDeletegeometry theme and modify it.
https://www.idealsvdr.com/